User Tools
Sidebar
Application Menus
Customized Menus Collection (Replacing the APPWIZARD)
In some cases, the APPWIZARD (2 levels of menus) ma be too small, or even we want to customize even more deeply the design of the application menus.
For this, we have the entry-point=“ColeccionConMenuPersonalizado“ attribute in the app node, to indicate the collection we want to execute immediately after the user has logged in. (Regardless of whether the normal login is done or it has also been customized, see the previous option. ). By using this attribute, we will ignore completely the appwizard.xml file and the programmer will be in charge to design its own menus in the collection indicated in such attribute.
<?xml version="1.0" encoding="iso-8859-1"?>
<xml>
	<app prefix="gen" version="0.0.0.26" entry-point="MenuPersonalizado">
		<!--
		<style url="default.css">
		<style url="default_hor.css" conditions="phone:horizontal"/>
		<style url="default_tablet.css" conditions="tablet:vertical"/>
		<style url="default_hor.css" conditions="tablet:horizontal"/>
		-->
	</app>

	<collprops type="general">

	<coll name="Empresas" ...>
		<group name="General" id="1" />
		<prop name="..." ... />
	</coll>
	<coll name="Usuarios" ... >
		<group name="General" id="1" />
		<prop name="IDEMPRESA" group="1" visible="0" type="N" mapcol="Empresas" mapfld="ID" />
		<prop name="LOGIN" visible="3" group="1" type="T" fieldsize="10" fixed-text="true" size="10" />
		<prop name="PWD" group="1" type="T" fieldsize="10" fixed-text="true" size="10" visible="" />
		<prop name="NOMBRE" visible="3" group="1" type="T" fieldsize="30" fixed-text="true" size="30" />
		<prop name="USERTYPE" visible="1" group="1" type="T" fieldsize="30" fixed-text="true" size="50" />
		<create>
			<action name="setval" field="IDEMPRESA" value="##ENTID##" />
		</create>
	</coll>

	<coll name="MenuPersonalizado" title="Menu" fontsize="8" sql="" objname="" updateobj="" filter="" sort="" progid="ASData.CASBasicDataObj">
		<group name="General" id="1" />
		<prop name="MAP_TEST" group="1" type="TL" visible="3" title="Aquí va el menú" fieldsize="10" size="10" />
	</coll>
Currently we have two ways to make the menus for the application:
- By editing the APPWIZARD.XML file (We have 2 levels of Menus).
- If we want to customize the menus to make them completely to our liking or we have more than two levels of menus, we can make our own collection of personalized menus, with the design we want. To indicate the Framework not to use the APPWIZARD.XML file and uses instead our customized menus collection, we have to define the entry-point=”NombreColeccionConMenuPersonalizado“ attribute in the app node.
Appwizard.xml
The Appwizard.xml file defines the menus structure for the application.
Sctructure of the APPWIZARD.XML file
<?xml version="1.0" encoding="ISO-8859-1"?>
<!-- Línea que define la codificación del fichero -->
<xml>
<!-- Lugar donde se abre el nodo XML. Aquí no hace falta tener otro fichero de configuración de propiedades.  -->
	<app name="Xone" caption="Titulo Aplicación"/>
	<!-- Titulo de la aplicación, que se muestra en la parte de arriba al entrar en el FrameWork. -->
	<menus>
	<!-- Tendremos un nodo menus por cada tipo de usuario distinto que tengamos en la aplicación -->
		<user>
			<prop name="TIPO_USUARIO" value="Administrador"></prop>
			<!--
			Nodo para decidir que tipo de usuario entra.
			Para ello el nodo busca en la coll 'usuarios' del mappings, buscando el campo que está en el atributo 'name',
			para aquellos que tengan el valor igual que el que está en el atributo 'value'
			Esto lanzaria: SELECT * FROM Gen_Usuarios WHERE TIPO_USUARIO="Administrador"
			-->
		</user>

		<item name="Personal">
		<props caption="Personal" imgbk="logo.gif"/>
		<!--
			Nodo para crear los distintos menús en forma de pestañas.
			Posteriormente dentro de este nodo, se insertan las opciones que pueda haber dentro de la pestaña.
				name: Su valor debe ser único en todo el Appwizard.
				caption: Título de la pestaña-menu.
				imgbk: Imagen que saldrá de fondo en la pestaña.
		-->
			<item menu="personal" name="mnUsuarios">
			<props caption="Personal" icon="../icons/cliente.bmp"/>
			<!--
				menu: Se suele poner el nombre de la pestaña donde va ésta opción.
				name: Su valor debe ser único en todo el Appwizard.
				caption: Titulo del icono que sale en pantalla.
				icon: Ruta hacia el icono.

			-->
				<coll name="Centros" mode="0">
				<props caption="Los Usuarios del sistema" mask="31"/>
				<!--
					name: Nombre de la Colección del Mappings.
					mode: Como se entra en la colección por defecto, modo listado (0) ó modo edición (1).
					caption: Titulo de la opción.
					mask: Acciones que se pueden realizar, como editar, crear, borrar o filtrar.
					loadall: Para cargar o no todos los datos de la coll.
				-->
				</coll>
			</item>
		</item>
	</menus>
</xml>
- In the previous structure the <menus> node will be repeated as many times as different user we are going to have in our application.
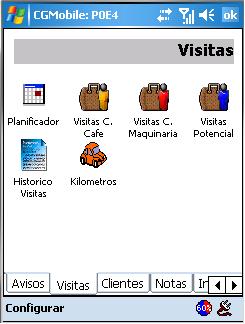
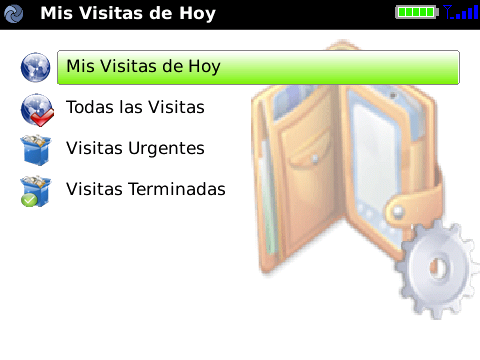
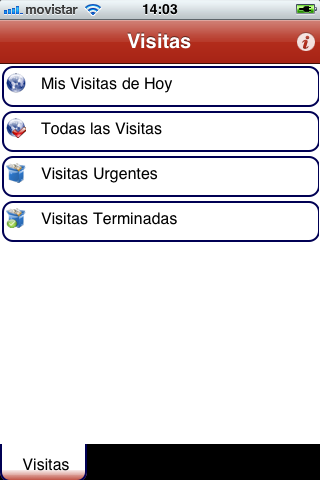
- Within the ”<item menu…“ node, we have another node ”<item menu…“ nested, the first one will correspond to the tab, and the nested one to the icons there are inside this tab, as we can see in the following images:
Attributes
| Attribute | Description |
|---|---|
| menu | is where we put the name of the menu used |
| name | its value must be unique in the whole Appwizard |
| Imgbk | it is to call an image, which will be displayed in the background |
| mode | it defines the way we are going to enter in the option by default, in list mode (0) or in edition mode(1) |
| Mask | actions to be make, such as edit, create, delete or filter. |
| Loadall | to load or not all the data of the coll. |
mask="value"
It is a number that in binary will indicate the operations that can be done over the collection.
The codification of that number is the following one:
There are several places where we can define the mask (permissions) to a collection:
| Attribute | Node |
|---|---|
| mask | In file appwizard.xml in the call to the collection |
| editmask | In the COLL node of definition of a coll |
| mask | In the PROP of call to a CONTENTS collection |
| nomenmask | In the COLL node of definition of a collection (Mask when we call from a magnifying glass to this collection. ) |


